• 123, New Lenox, UK, IL 57403

Call Us For Free Delivery: 123-456-7890

Grain shaker pots. For strain testing and grain to grain transfer.

£14.99£199.99

May I present for your Grain Shaking Pleasure. 

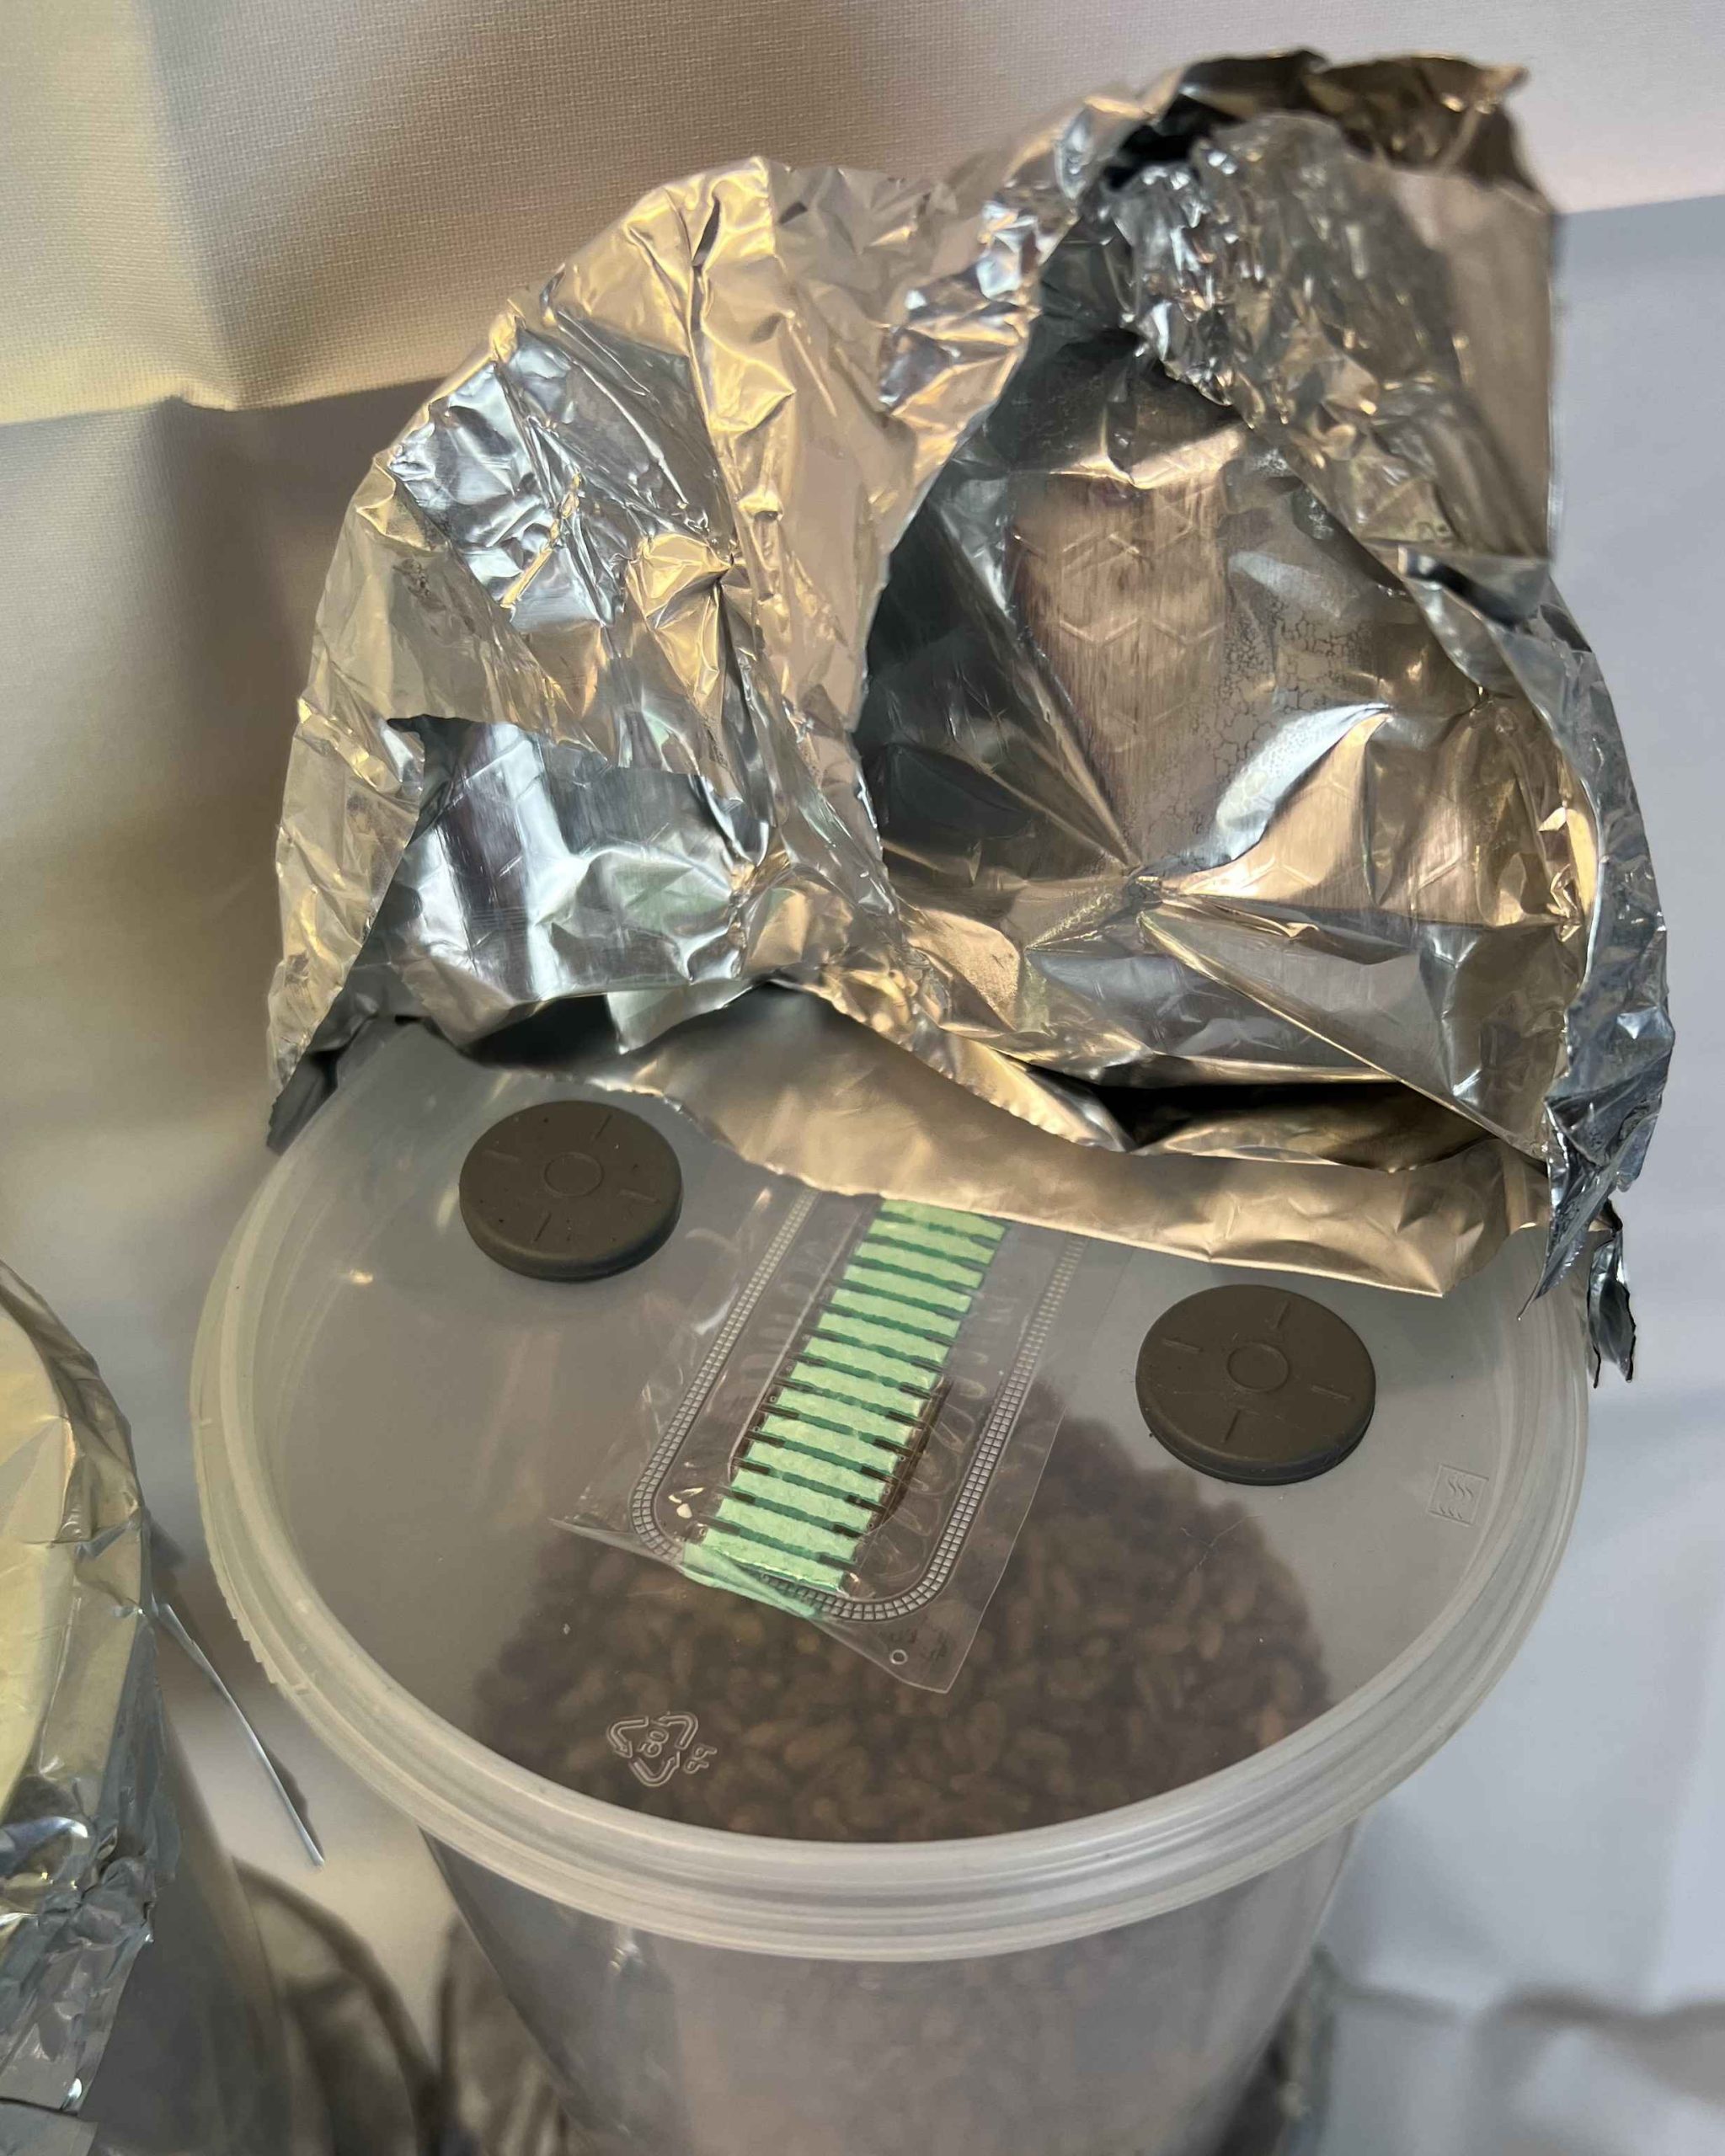
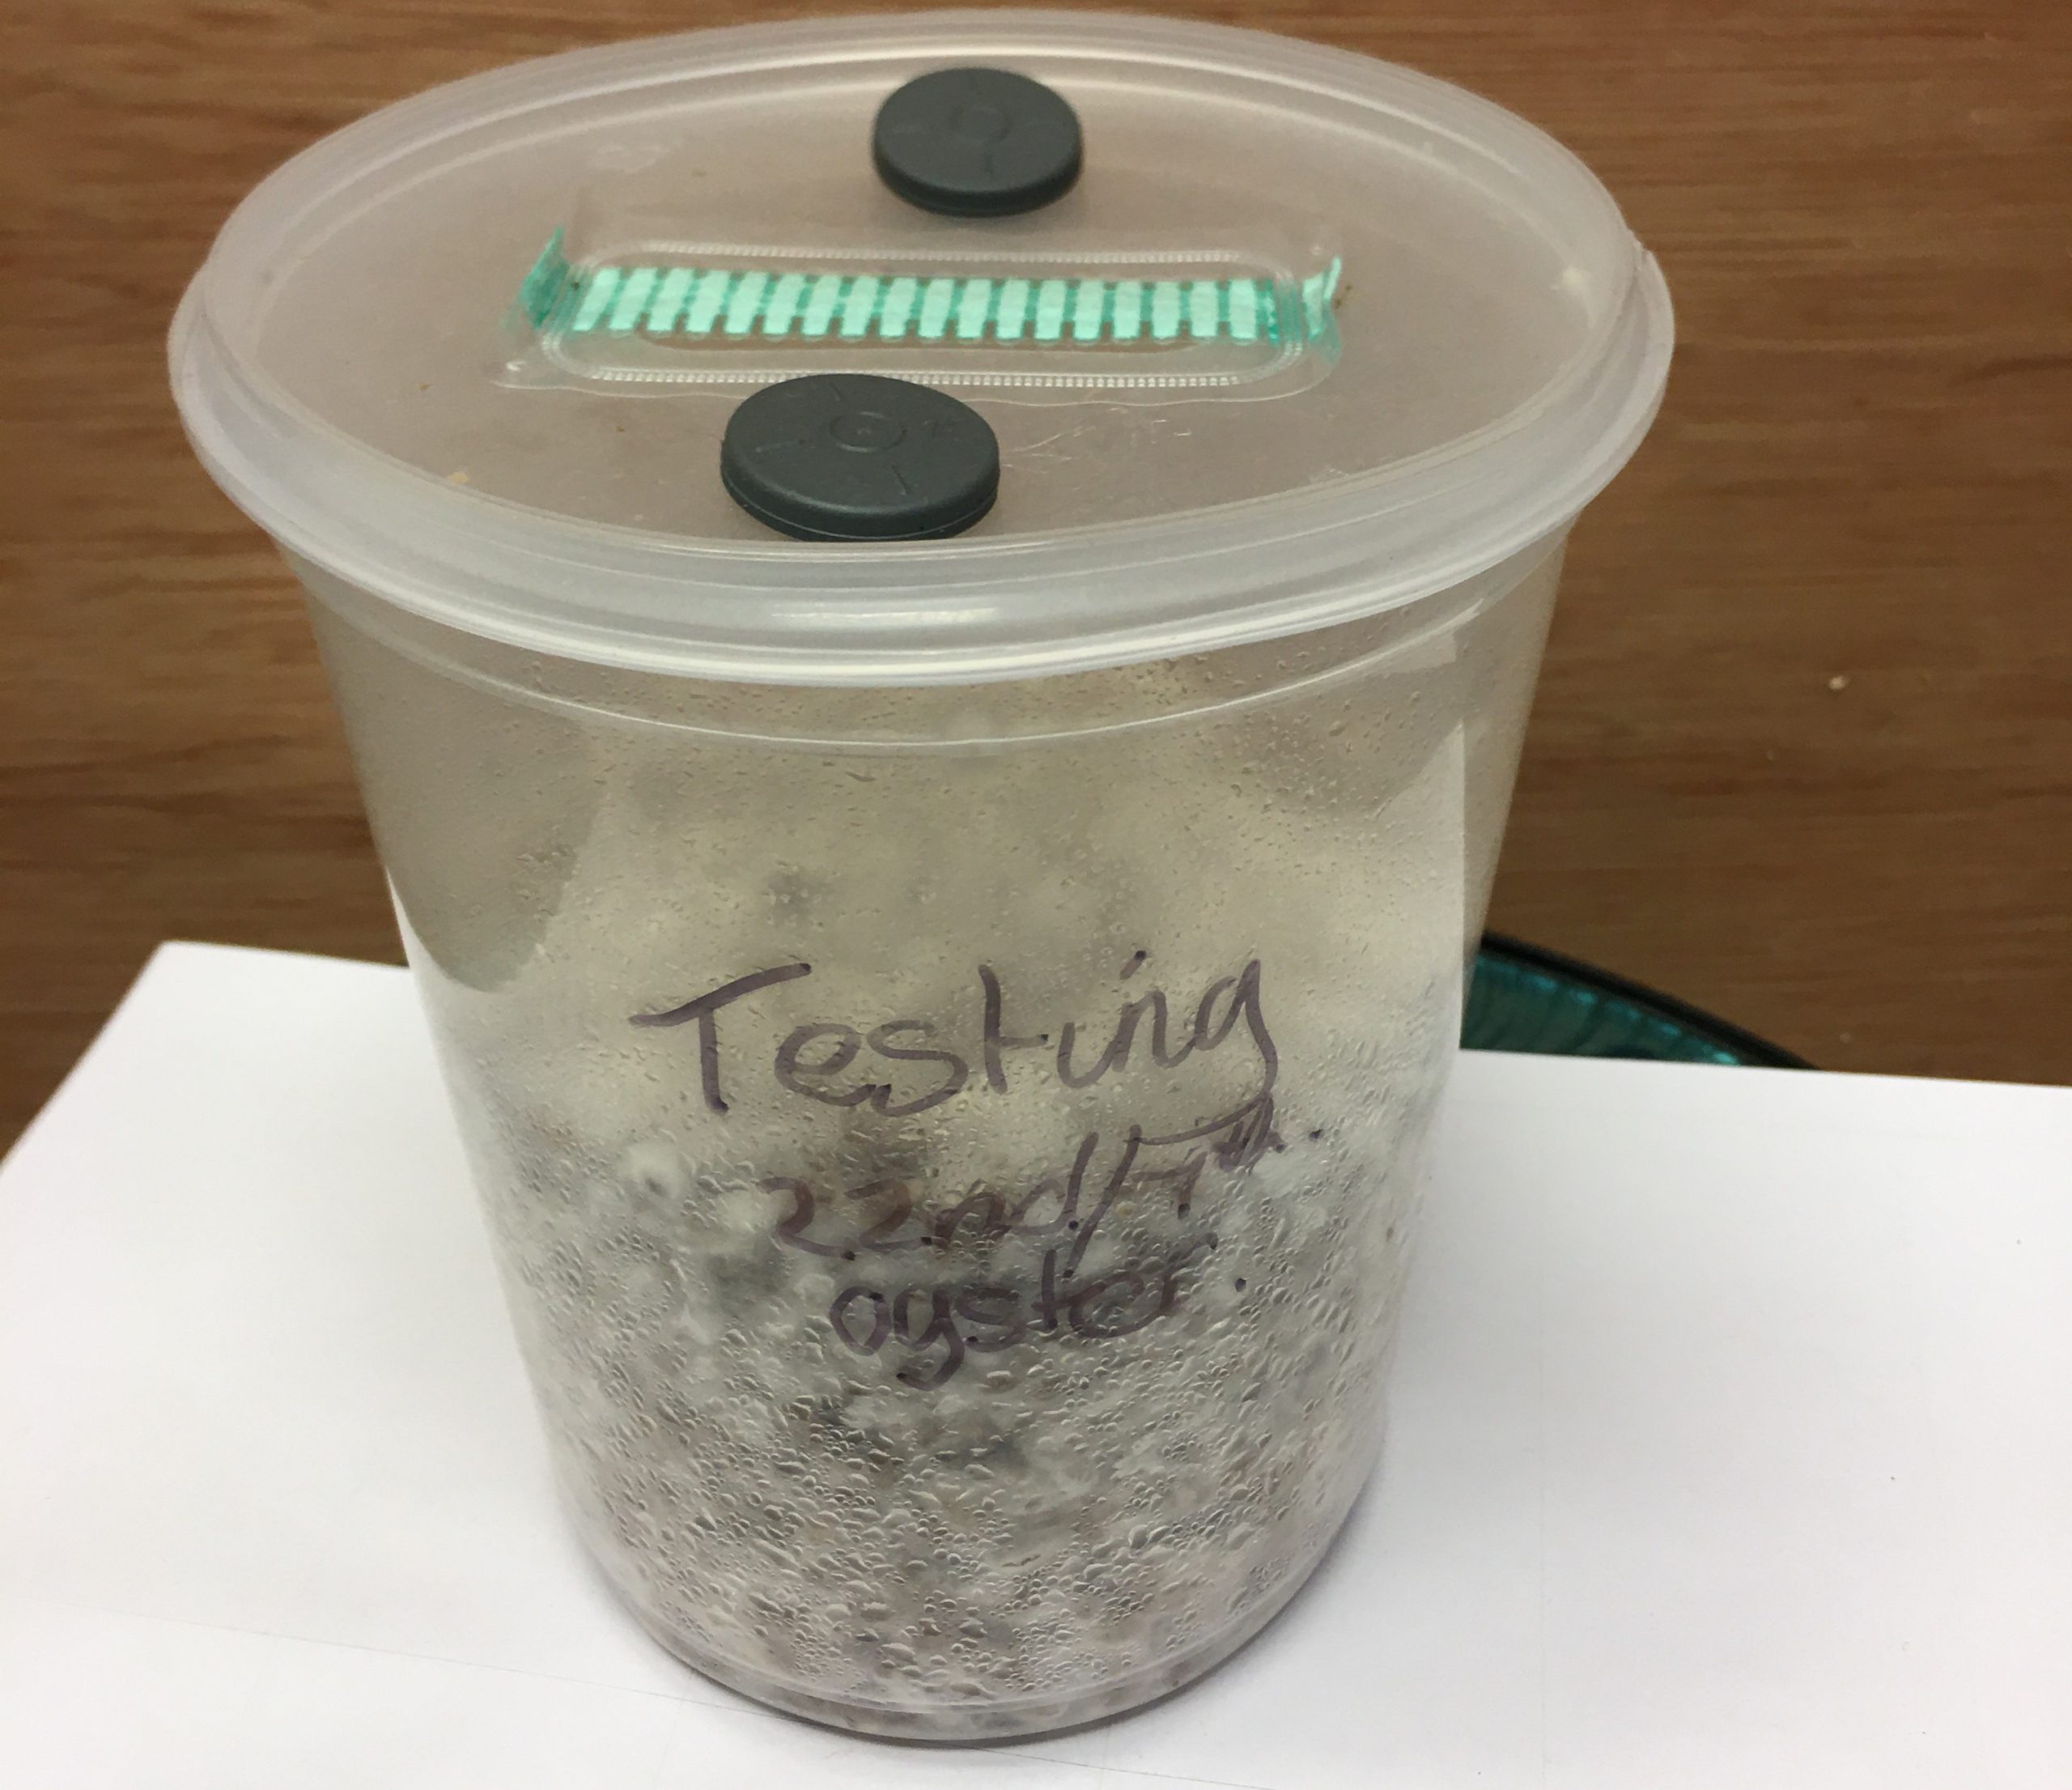
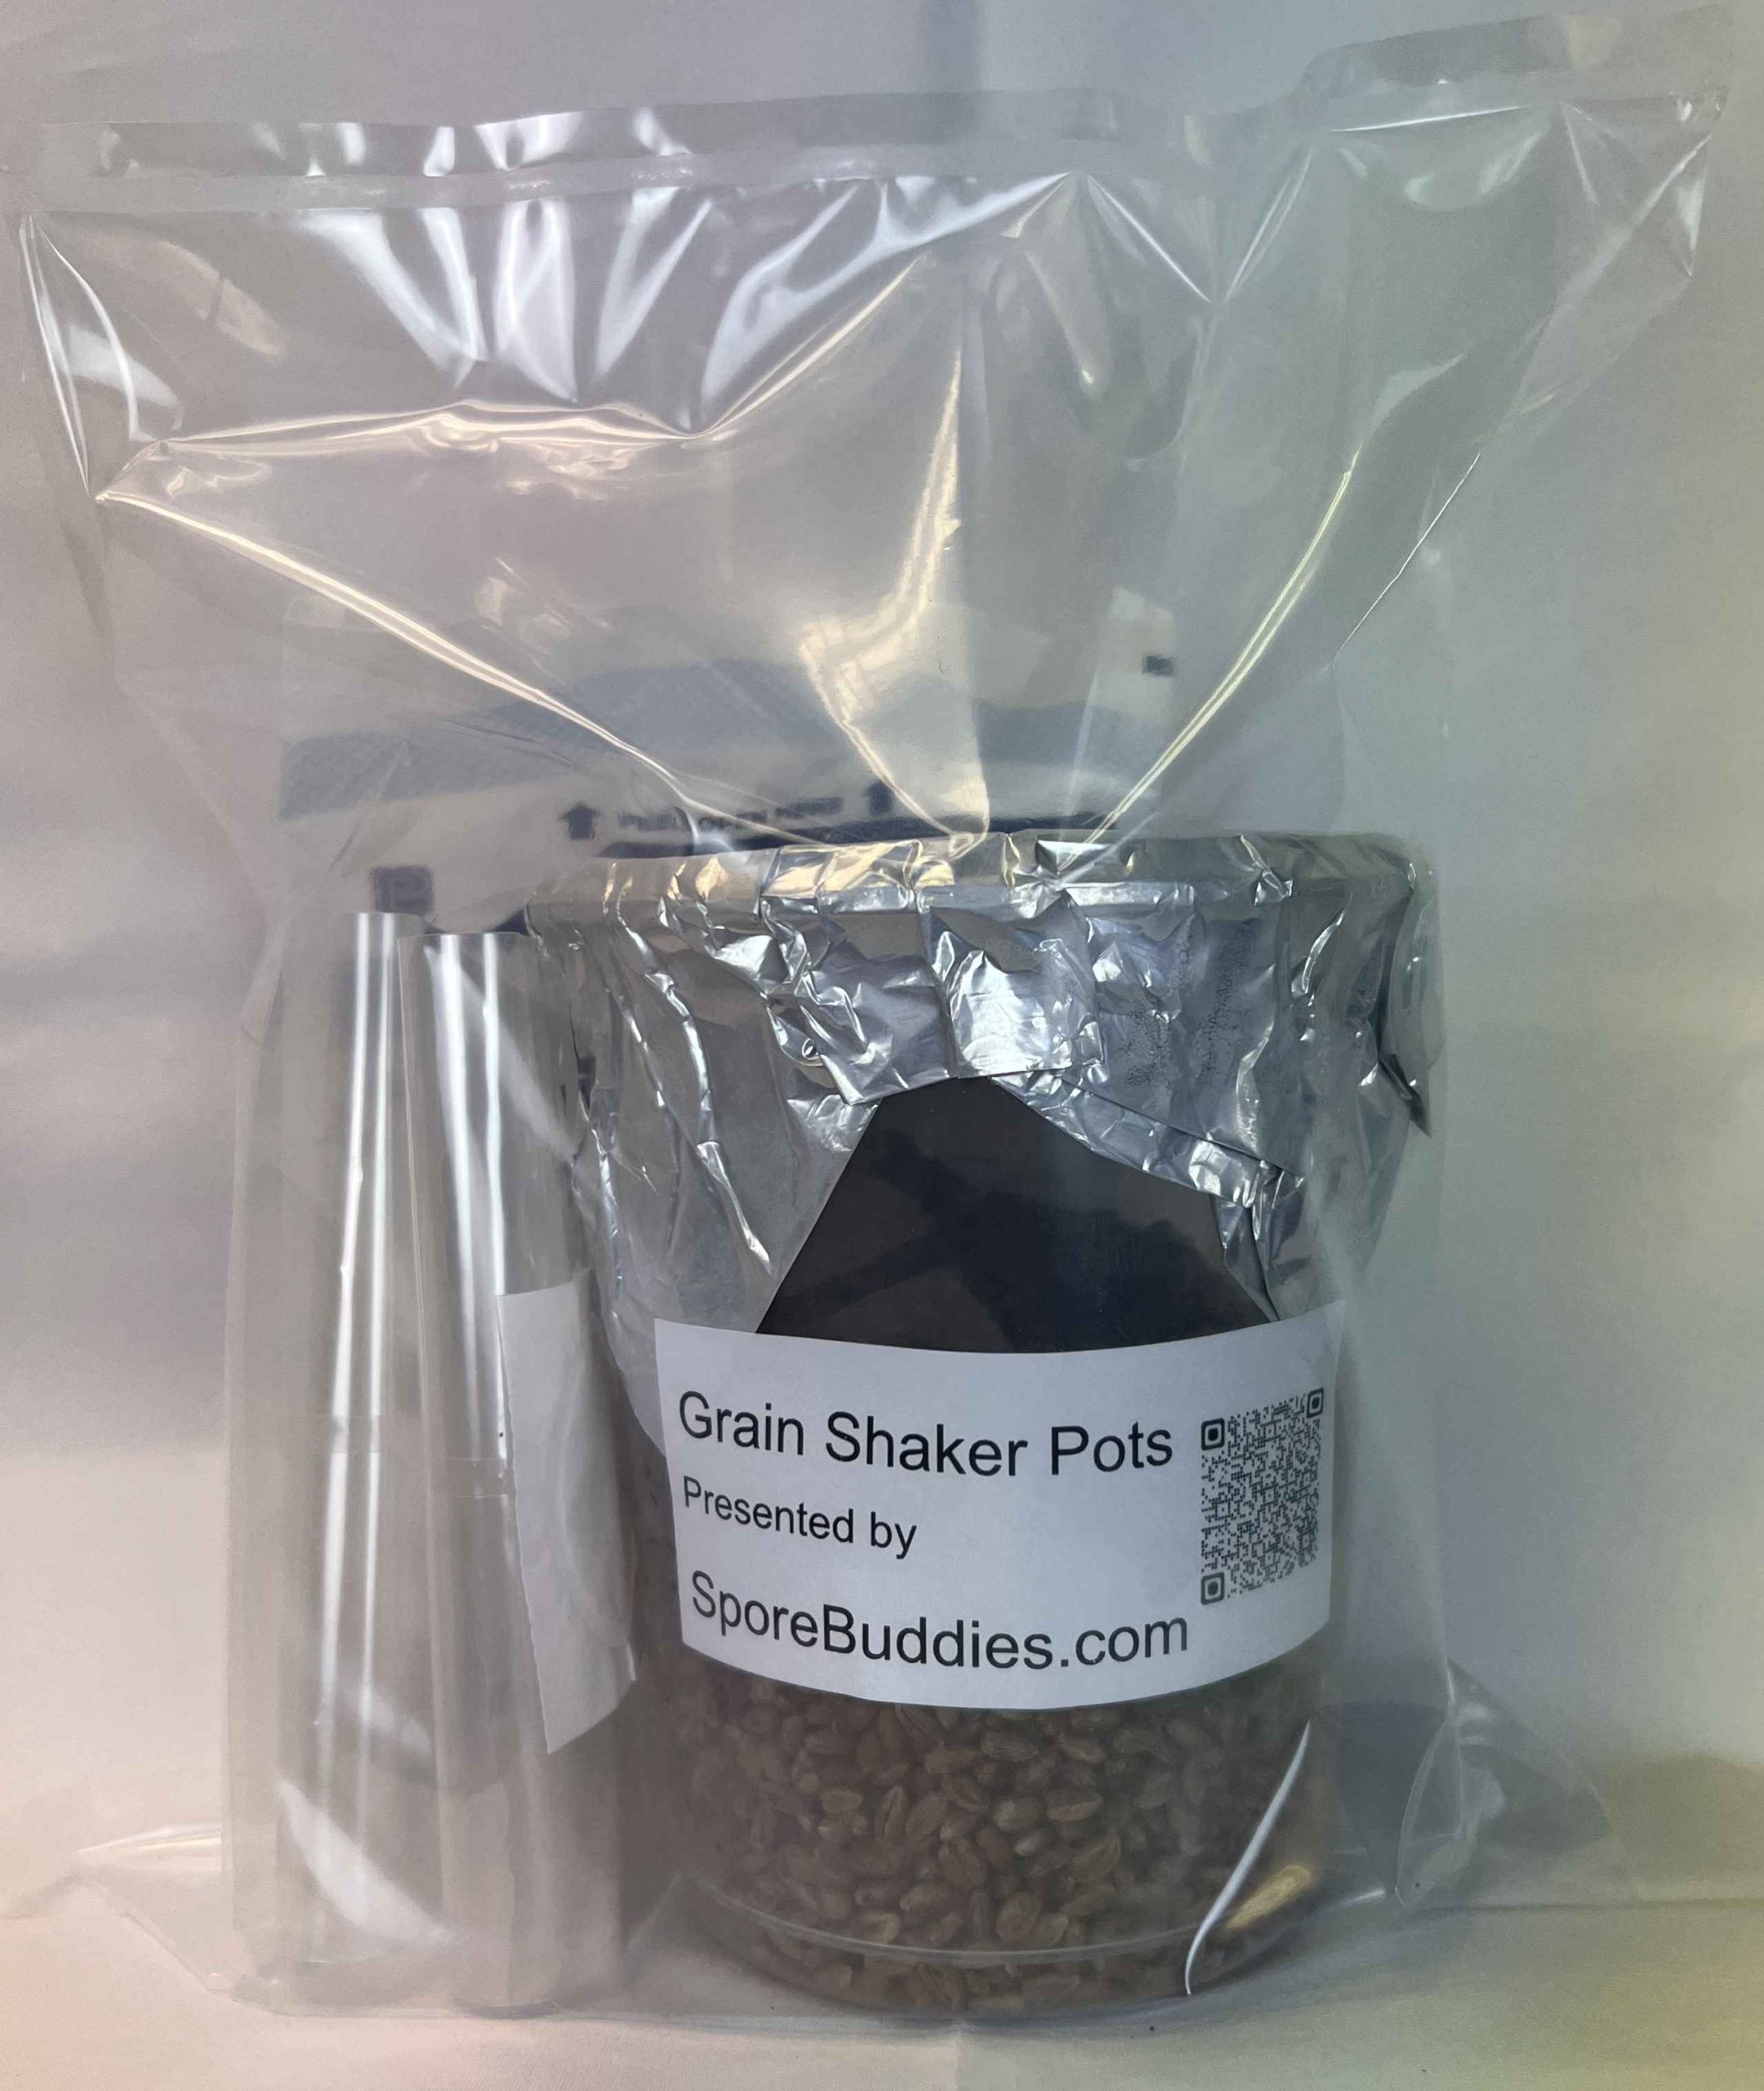
“Grain shaker pots” in a re-usable 1000ml pp5 pot with filter lid and dual injection ports.

Fully sterilized and ready to use.

Uses:

1: Directly injectable. Spores to Grain or Agar to Grain.

2: Air space to allow for shaking up the pot for fast colonization.

3: Strain testing for possible contamination.

4: Grain to Grain transfer.

5: Spawn running for Mono Tubs.

6: Fruit from the Pot.


What do you get?

1: 1000ml PP5 pot. (PP5 means Pressure cooker safe).

2: Snap on PP5 Filter lid and two injection ports.

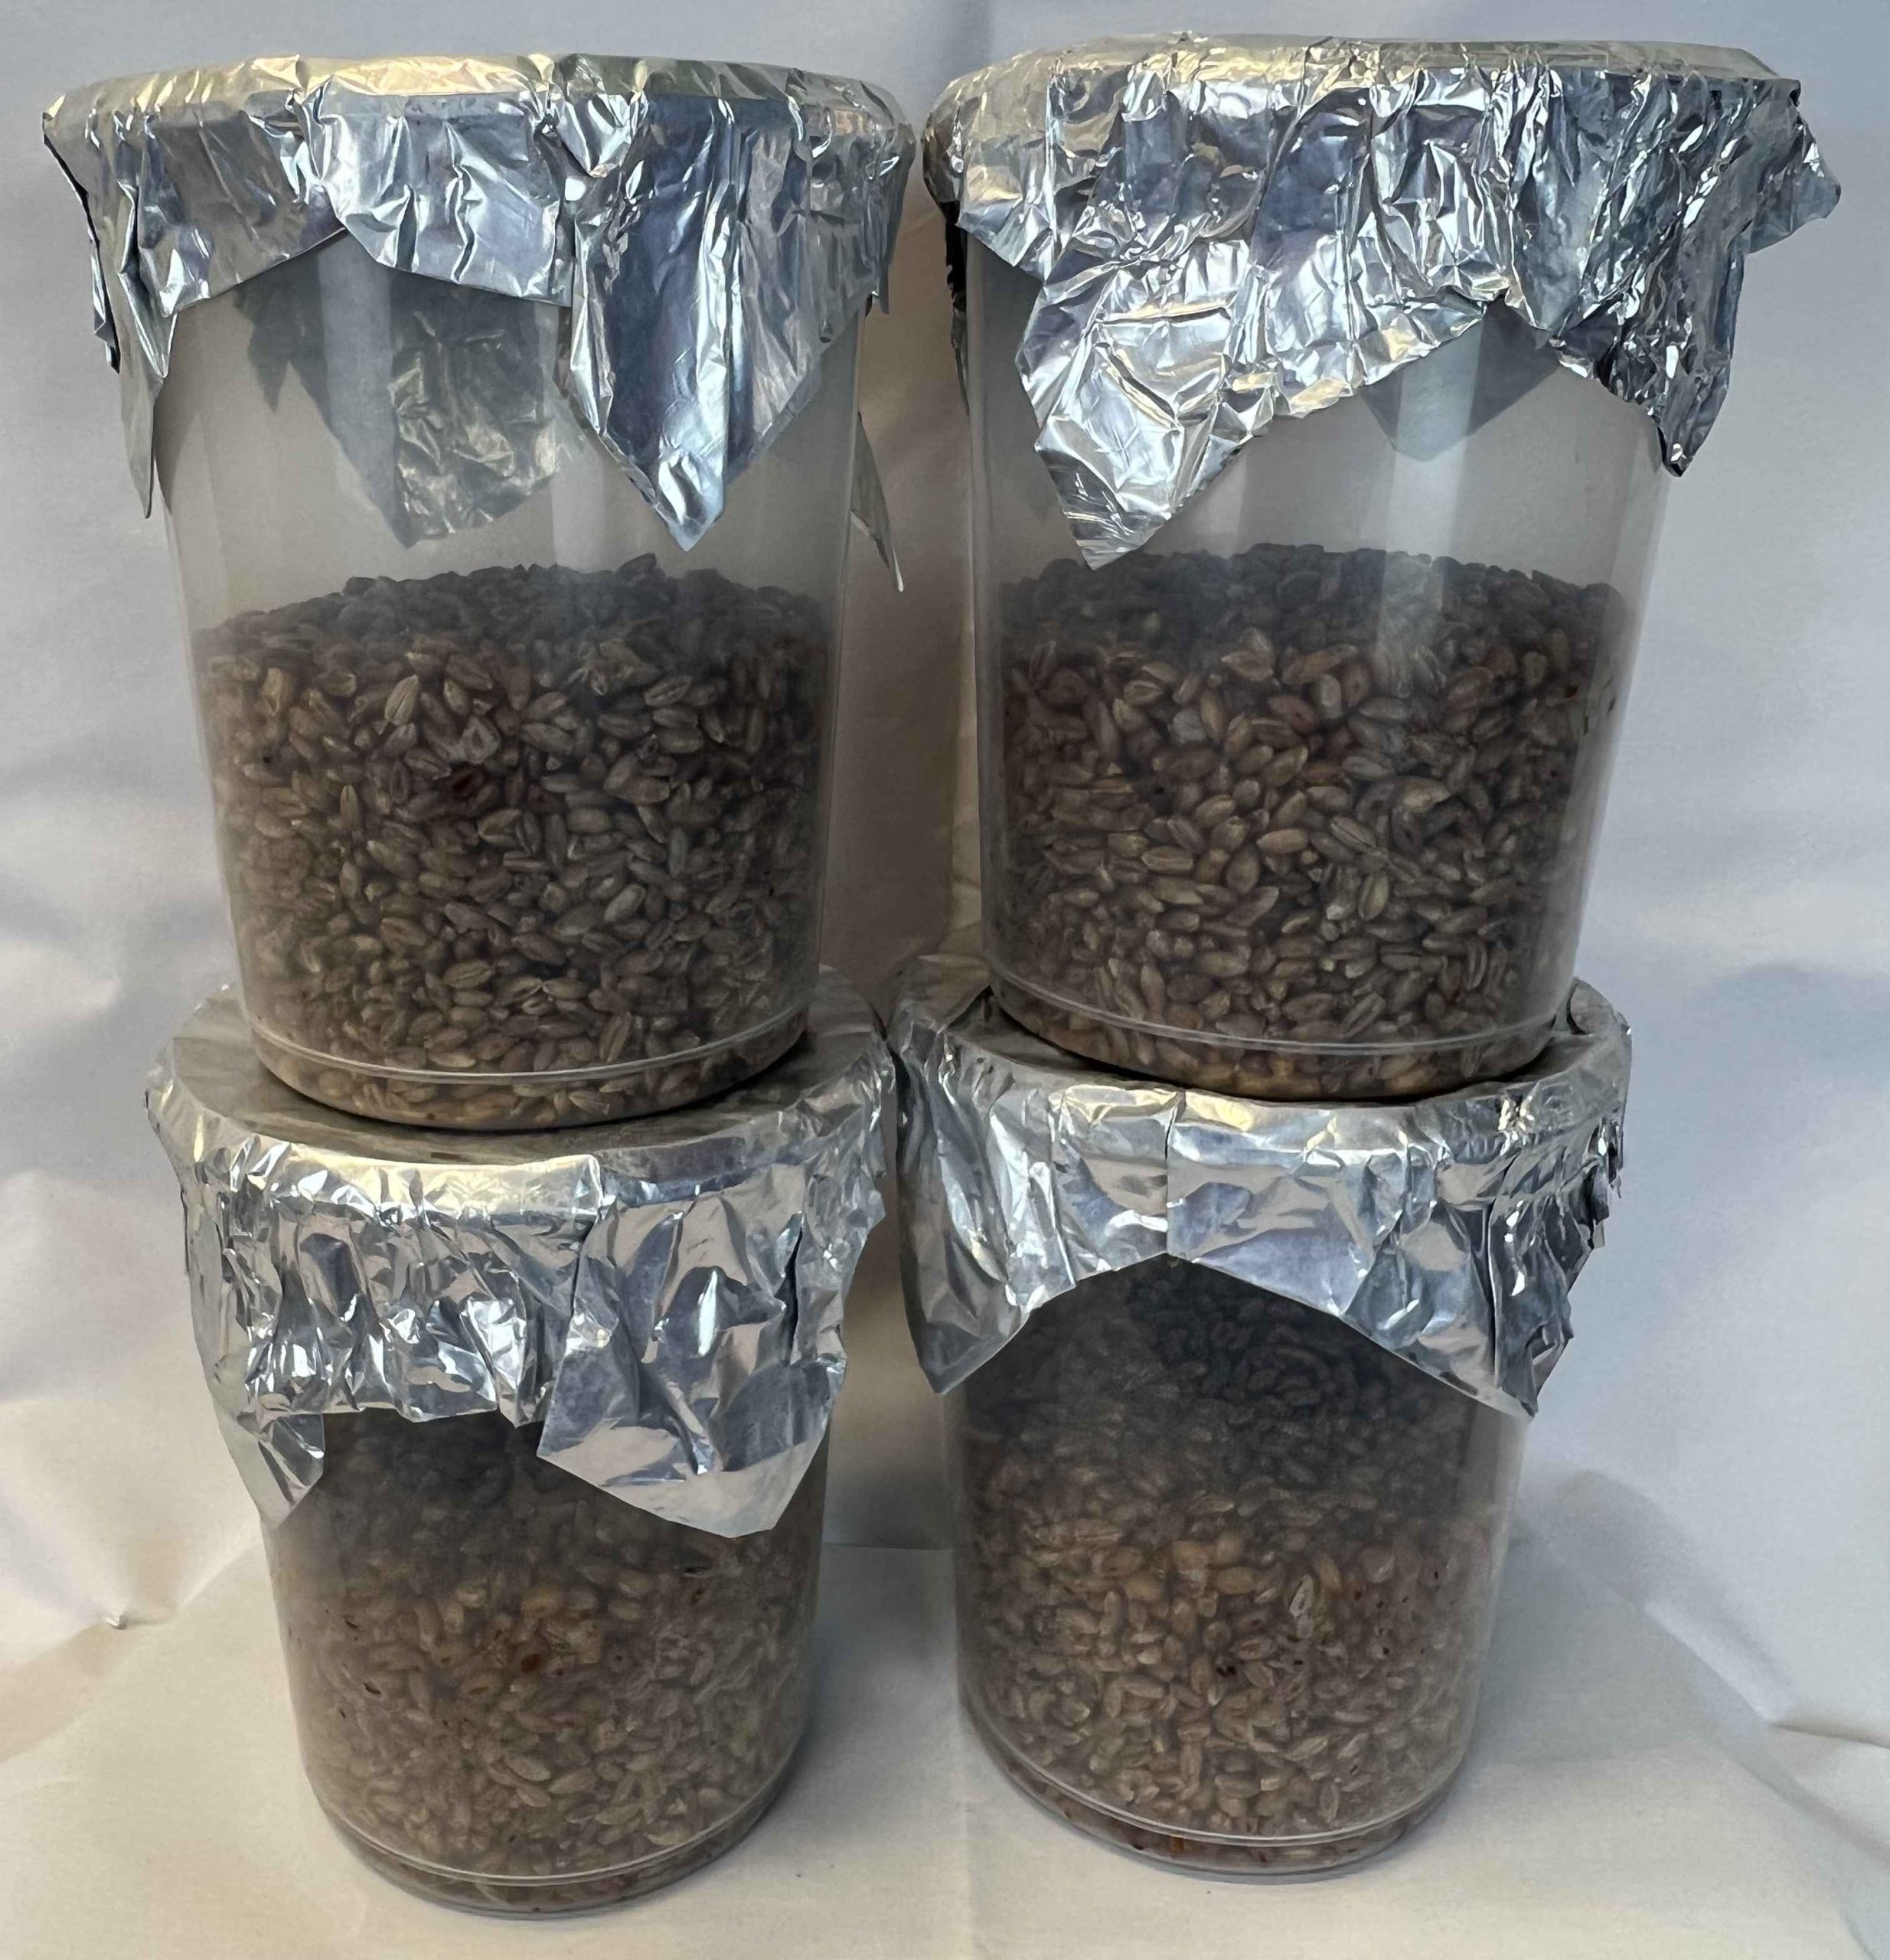
3: 500ml of perfectly hydrated Rye Grain.

4: Double layered tinfoil cover. This keeps the injection ports clean and ready to use. No need to wipe them.

5: MycoMedi glove pack. Contains gloves and a sterile surface to work on.

6: Fruiting bag (10B).

What don’t you get?

1: Spore Syringe and needle. Use minimum of 1ml. Max is 20ml without seeing moisture issues. 

2: Heat source. Please incubate the pots at 26-27c for the fastest germination and colonization times.

3: Alcohol swab. The included foil cover keeps the injection ports 100% sterile and ready to use by removing the foil cover.

4: Fruiting bag for “Fruiting from the pot option”

What do you need to use the pots and how do you do that?

Please see the news section for the instructions HERE

1: Directly injectable. Spores to Grain.

Injecting the spores into the pot. 

1.1 Remove the colored cap from the syringe and after opening the needle packet. Please screw the needle into where the colored cap came out of.

Leave the needle protector in place until ready to use.

Do not heat or wipe the included needle. It has been gamma irradiated and is sterile.

1.2 Remove the protective foil cover from the pots lid. This has kept the injection ports sterile so there is no need to wipe the injection ports. Do not remove the lid or any parts from the lid.

After shaking the syringe very well. Please inject a minimum of 1ml and up to a maximum of 20ml spore solution into the pot. 

Agar pieces can be placed into the pot by removing one injection port. Please add a 1cm square piece of agar to each pot. 

Shake the Grain shaker pot to speed up colonization.
Colonize the pot in darkness.

I like to leave my pots alone after injection and only shake them when I see life appear. Choosing just to place the pots in a GrowBuddie or on a heat pad. Set to 26-27c.

Germination of spores will vary dependent on strain but expect to see life between 3-10 days. 4-5 days being most common.

2: Air space to allow for shaking up the pot for fast colonization.
Shaking the jar to spread the mycelium and speed up colonization. 

2.1 As mycelium tends to grow at the rate of about 1cm a week. It is best to give the mycelium a helping hand. By shaking the pot some 3 days after you first notice life, you will be able to break up and re-distribute the mycelium all through the grain.

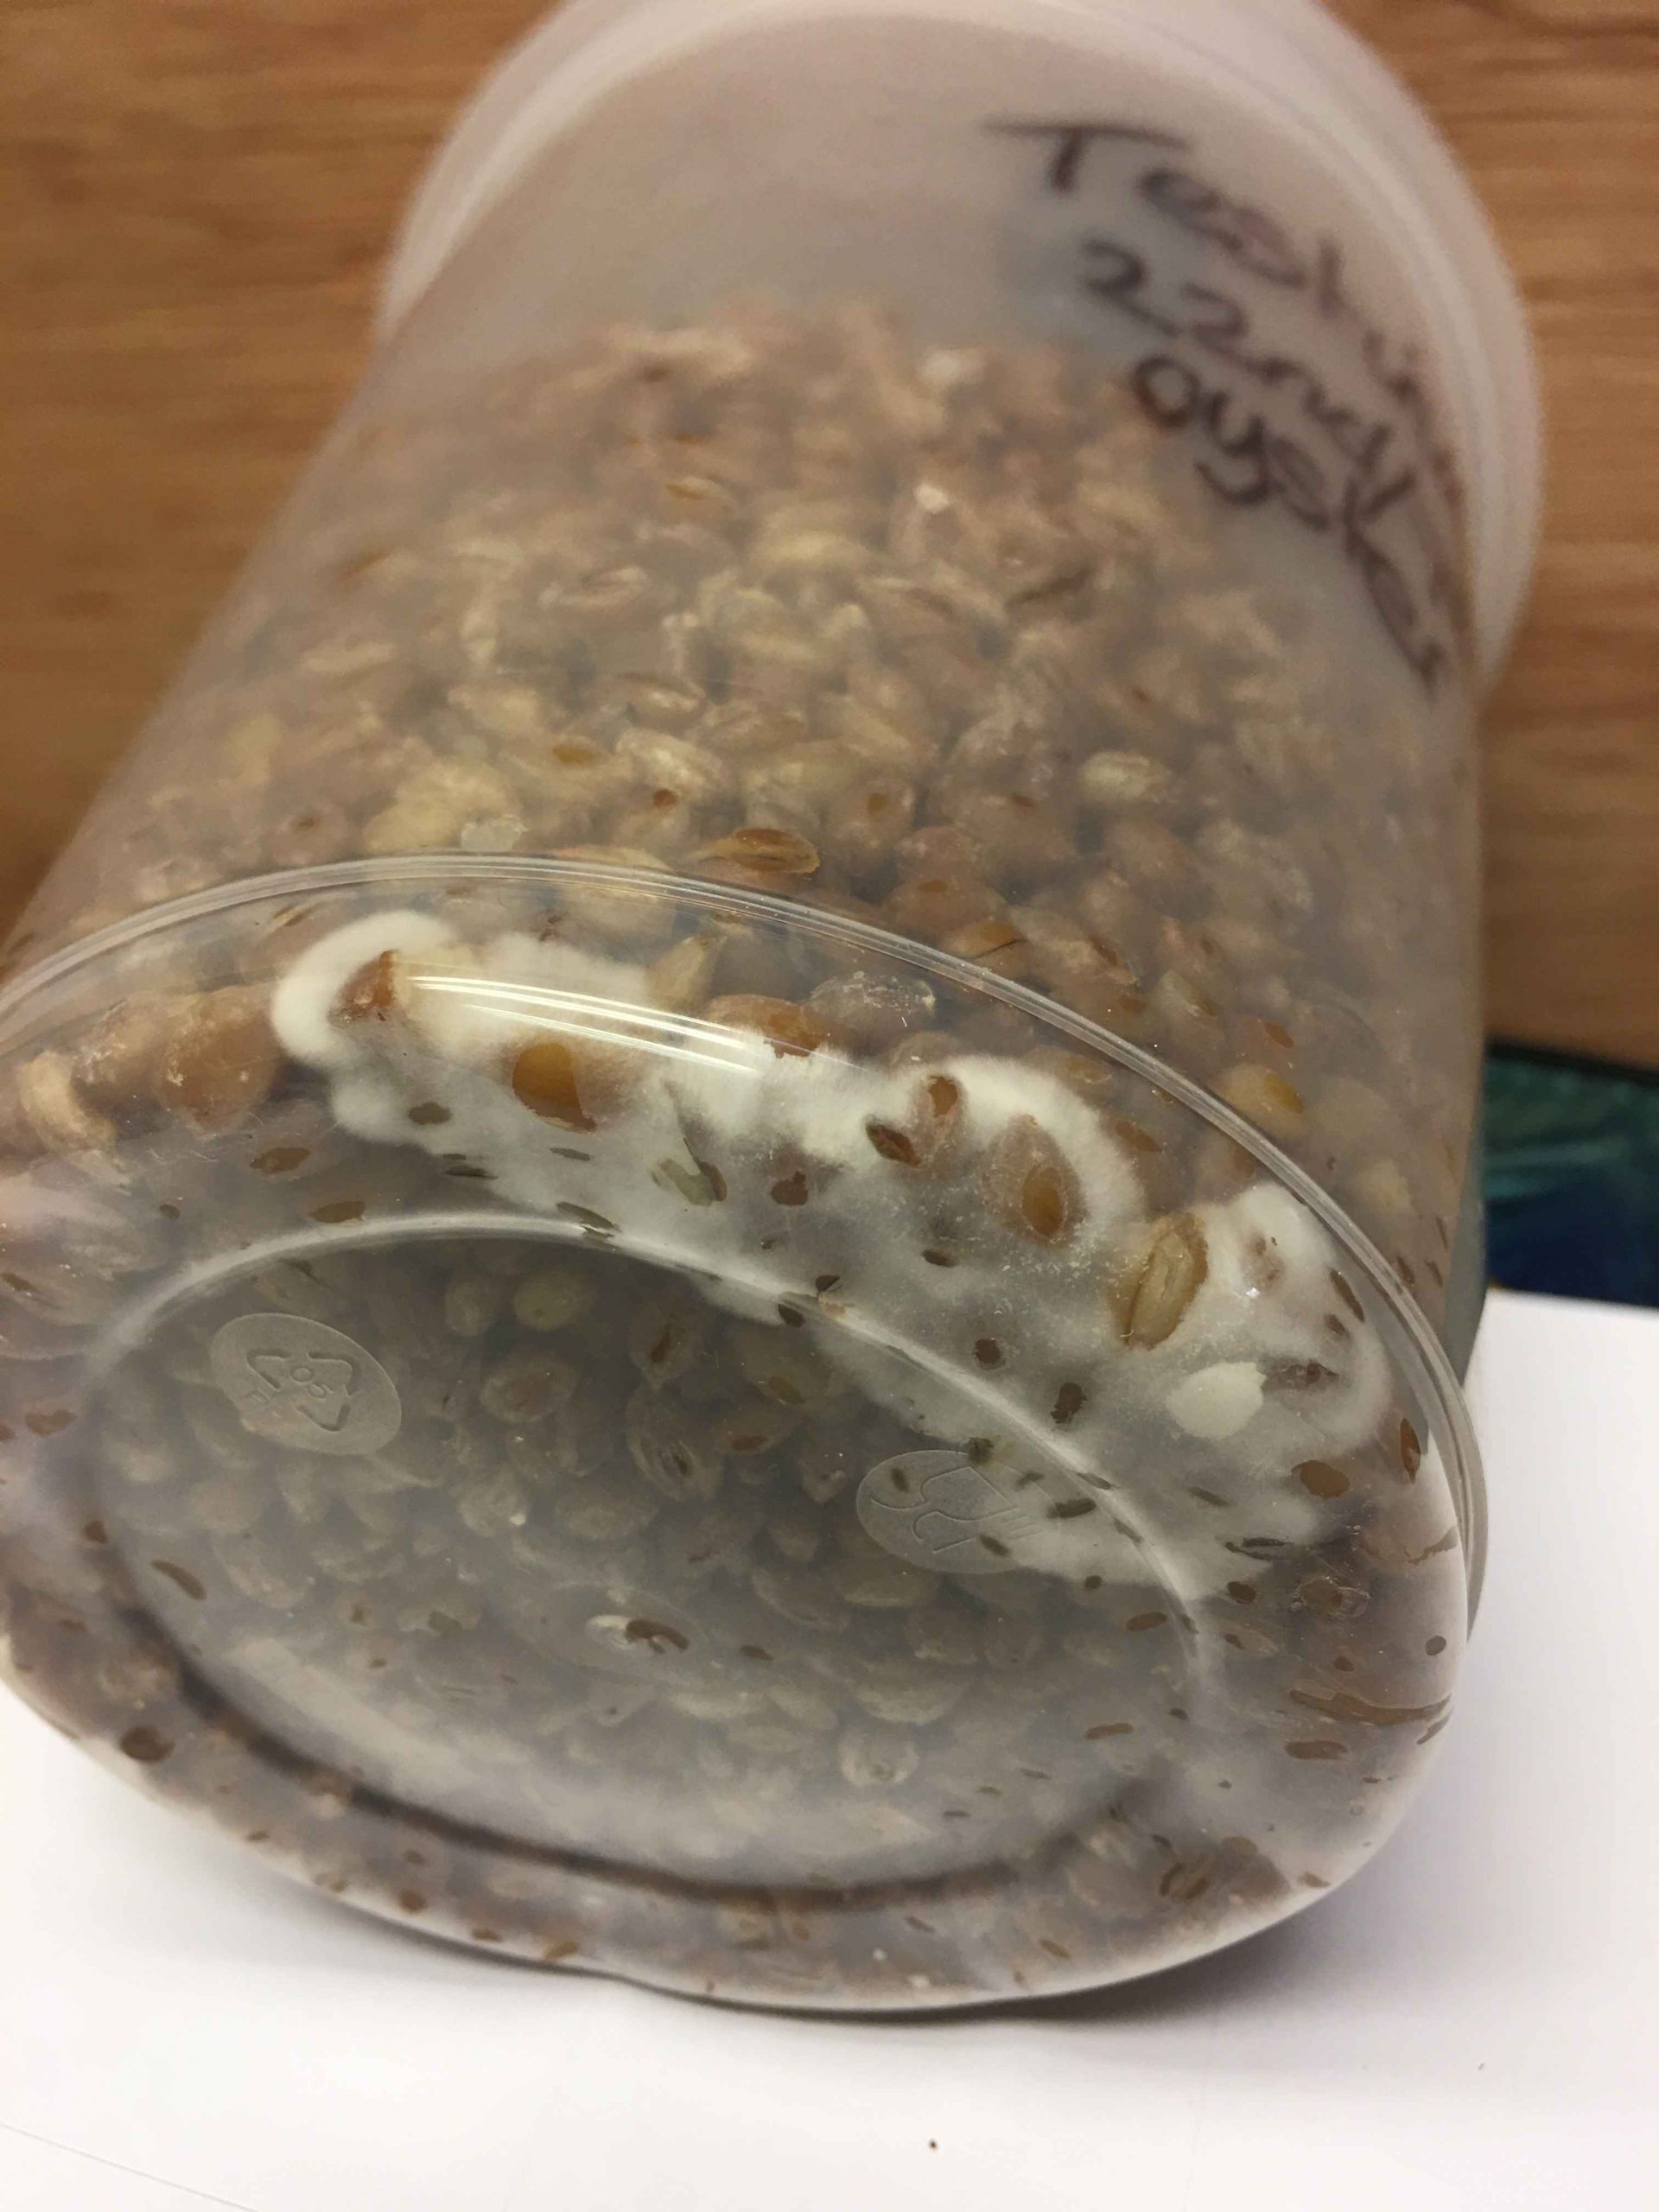
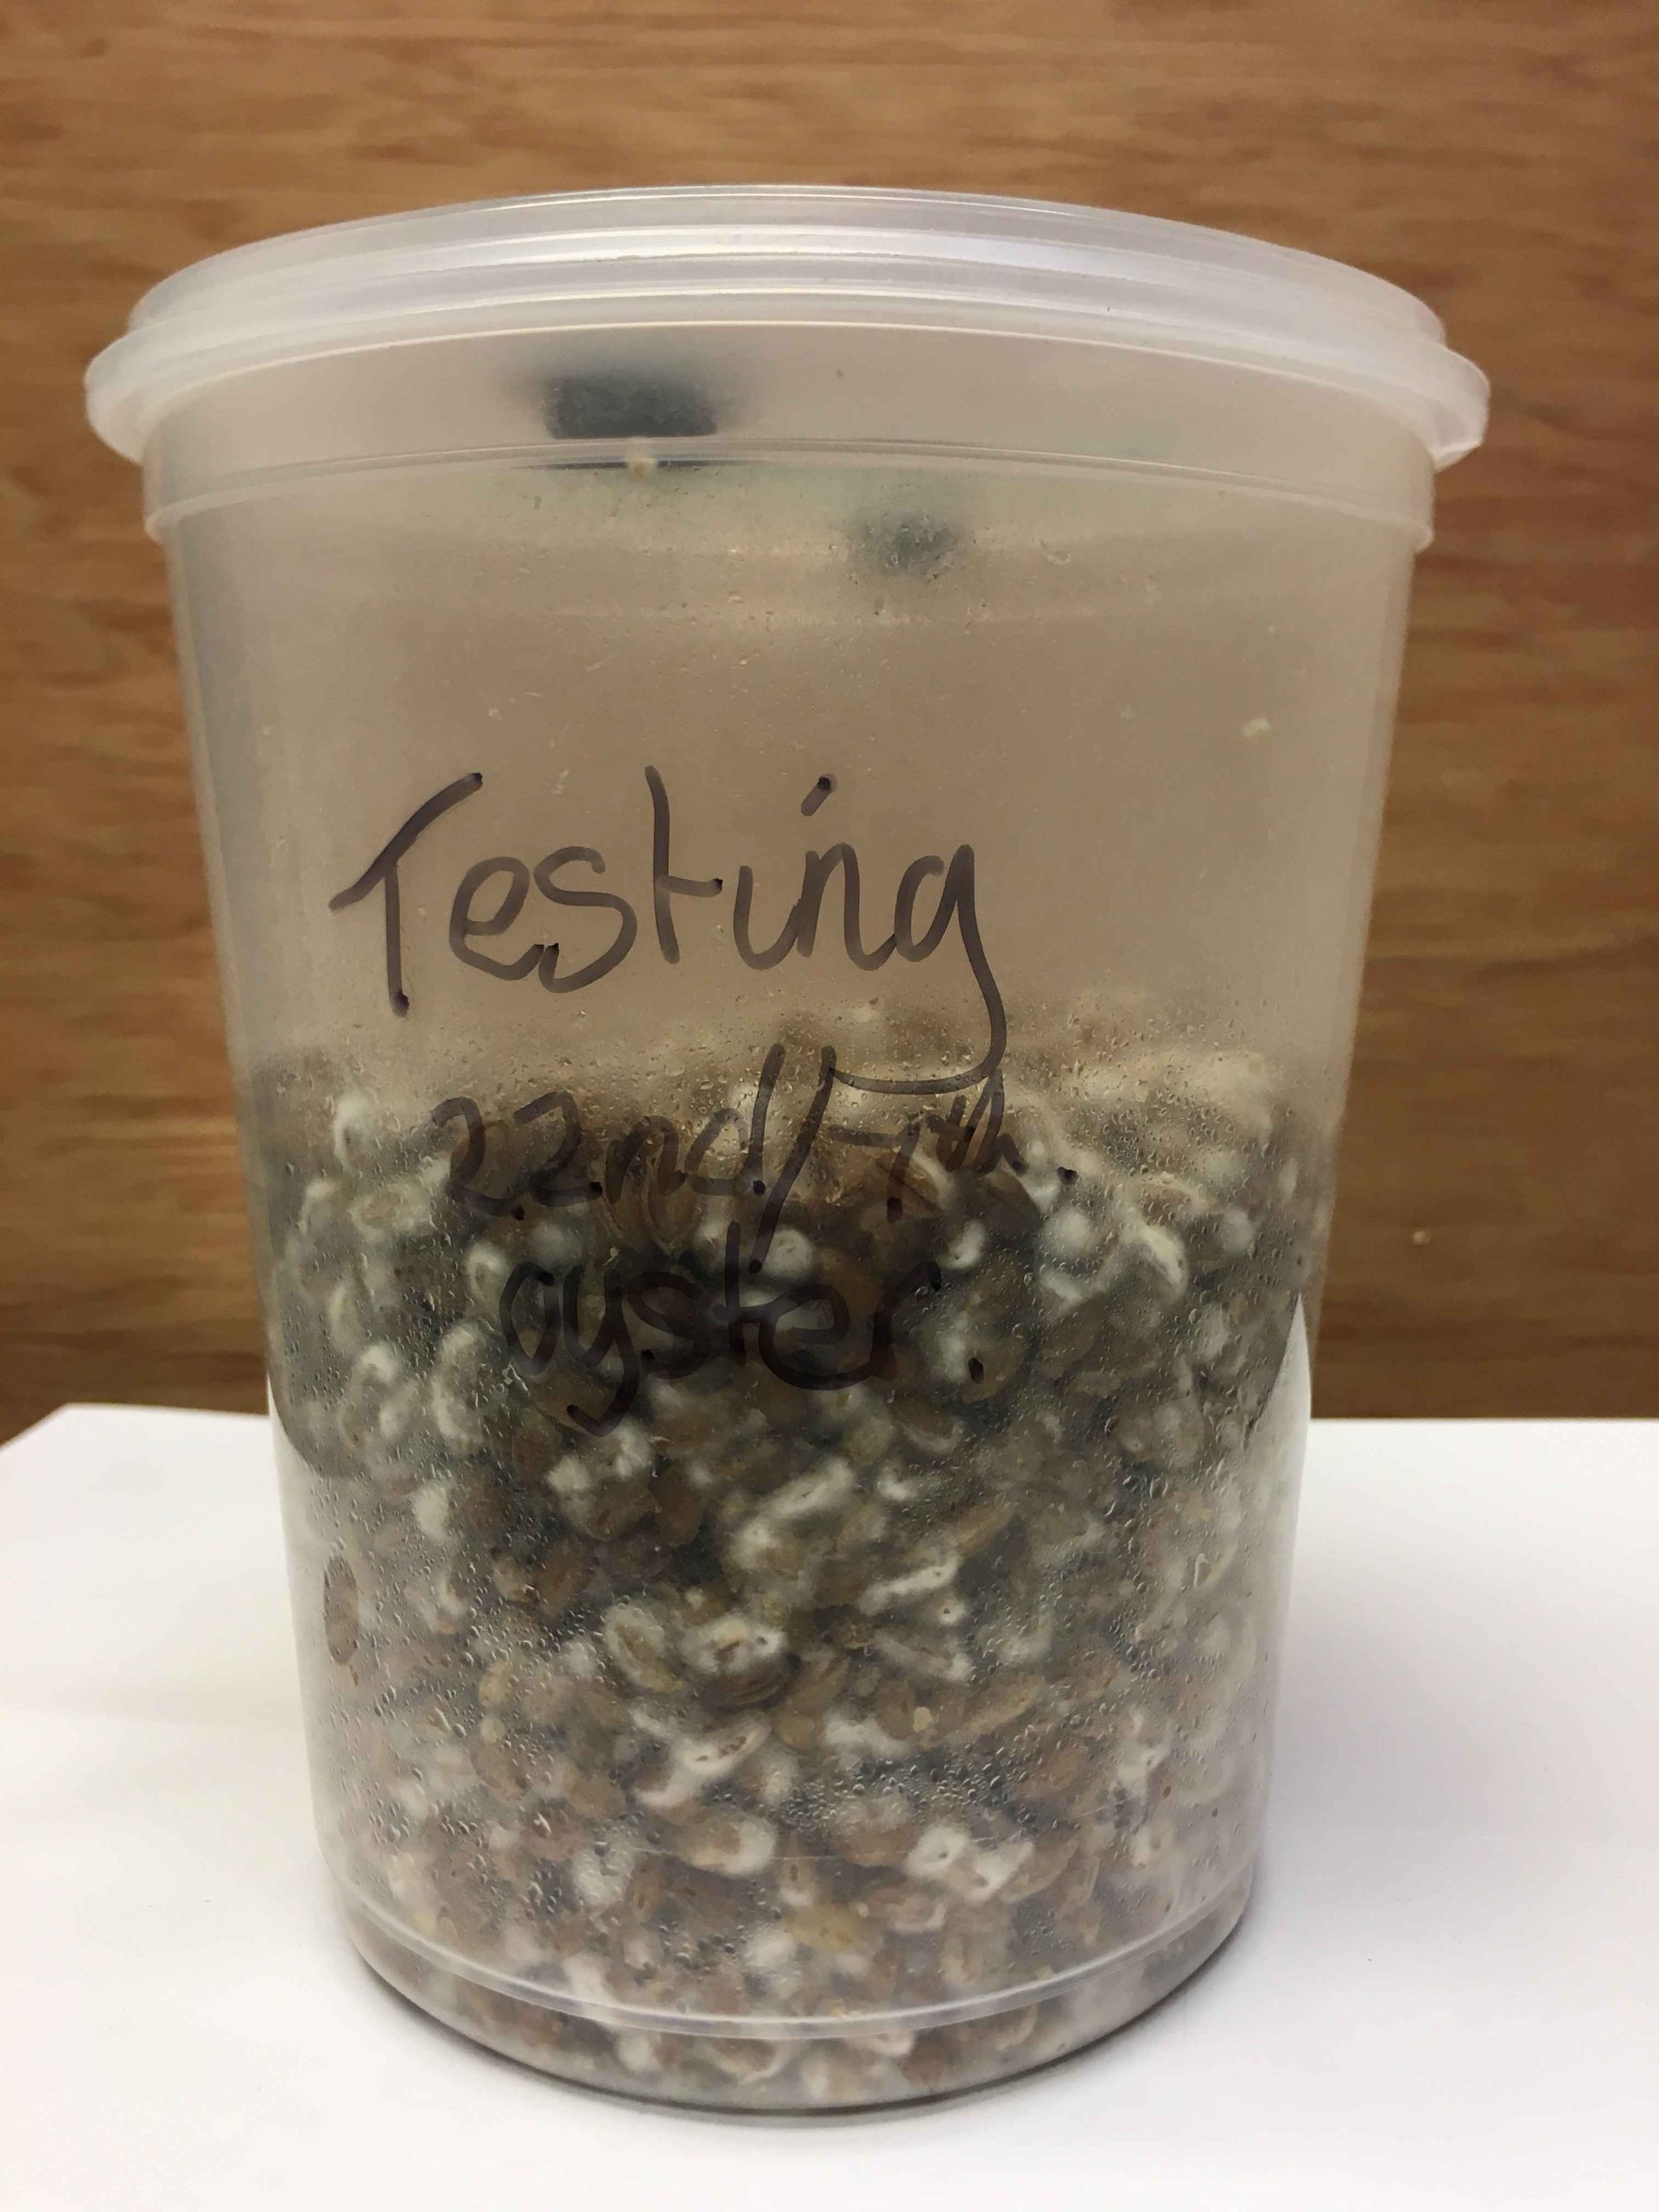
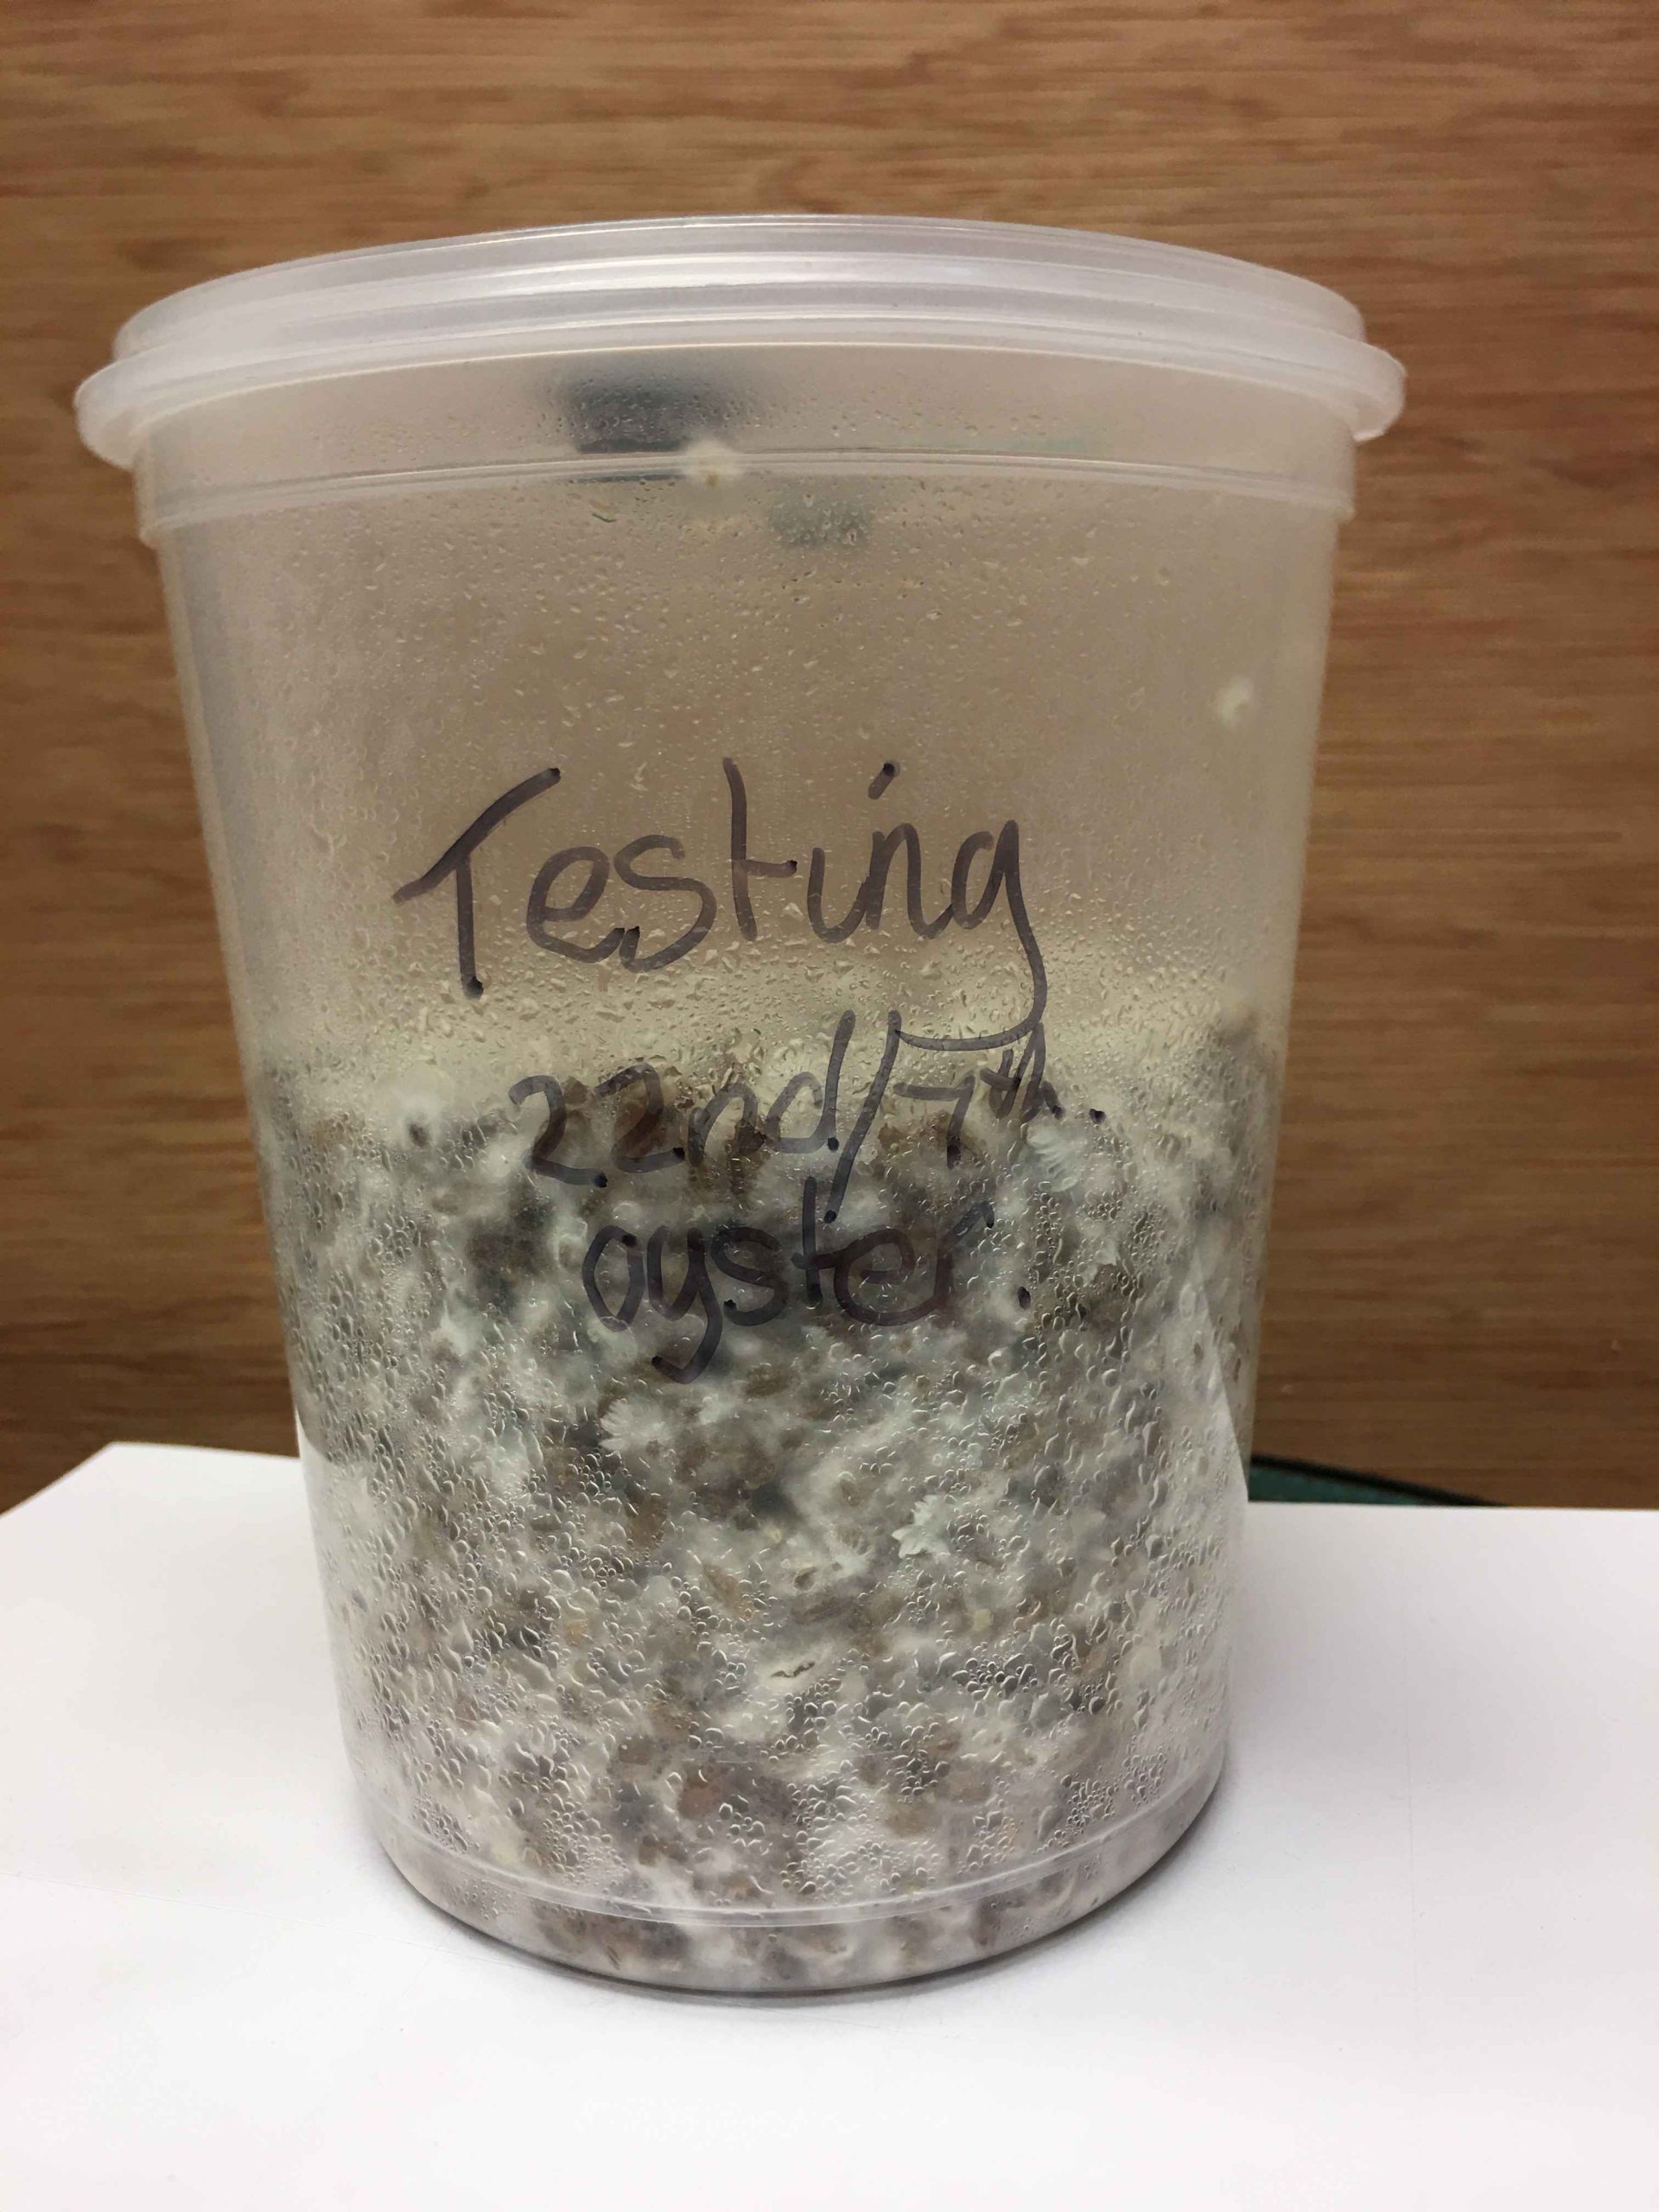
2.2 When the mycelium recovers and starts to colonize again. You will see that your shaker efforts have not been in vain. After that first shake and re-incubation at 26-27c. The mycelium will show in multiple places.

Colonize the pot in darkness.

2.3 Shake the pot one more time when the mycelium spots have grown to about 1cm on average.

2.4 The pot is fully colonized when all the grains are white with mycelium. When the pot is fully colonised, it is ready to use.

3: Strain testing for possible contamination.

Use the “Bake and Shake” method to check for any possible contamination. 

3.1 BAKE. You have already followed these steps in part 1 and 2. When you incubated the pots at 26-27c. You would have noticed other colors forming in the pot if contaminations were present. White mycelium is great, but any other contamination will show as a color or smell. The clear pot and the high air flow filter in the lid will allow you to inspect the mycelium. A quick sniff of the filter lid will allow you to recognize any off smells like sweetness or alcohol.

Colonize the pot in darkness.

3.2 SHAKE. Every time you shook the pots to break up the grains and speed up colonization. You also allowed any hidden contamination to show itself. Mycelium has an ability just like the human body does, to hide foreign objects or contaminates and encapsulate them. These contaminates always escape when mixing spawn to bulk. Shaking the pots mimics the process of spawning to bulk. So, if you have clean mycelium after shaking the pot… You know you have clean Mycelium full stop.

4: Grain to Grain transfer.

Grain to Grain transfer or G2G is a method to expand your existing Grain spawn. Allowing one Shaker pots to transfer mycelium to 10 Shaker pots for example.

O4.1 Each Grain shaker Pot comes with 2 injection ports. One of these injection ports will be removed to allow the master pot to transfer colonized grains to the slave pot with uncolonized grains.

4.2 Before removing the injection ports for transfer. You can Shake the Master pot to help break up the grains, so you have some loose to transfer.

4.3 Place both the Master colonized grain pot and the slave un-colonized pots in the sterile environment.

4.4 Remove one of the injection ports on the Master pot. Remove one of the ports on the slave pot.

4.5 Tip the pot to transfer some 5-20 grains from the Master Pot to the Slave pot and when finished please replace the port to the pots to keep the contents sterile.

4.6 Incubate the pots at 26-27c for 3 days before shaking the Slave Pots for the first time.

4.7 If contamination shows at any point. Please discard and start again from a new master pot.

4.8 When a slave pot has passed the Bake and Shake test and is fully colonized. The Slave pot has qualified and can now be labelled as a super clean Master pot. Only qualified Master pots should be used for Grain-to-Grain transfer or Mono Tubs.

5: Spawn running for Monotubs. 

The pot is said to be fully colonized when all grains are white with mycelium.

5.1: With the ability to shake the pots and spread the mycelium. The pots produce Grain Spawn in record times.

Colonize the pot in darkness.

5.2 Follow step 1+2 above to achieve fully colonized spawn pots in just 2 weeks.

5.3 Use a heat source such as a growbuddie60 incubator box or heat pad. All Sporebuddies own brand heating systems come pre set and are plug and play friendly.

5.4 A 45l Mono Tub or GrowBuddie60 will need 3 “Grain Shaker pots” as spawn and 2x 1kg bags of our Coir+Verm+Gypsum bulk substrate. CVG for short.

5.4.1 A 25l Mono Tub or GrowBuddies40 only needs 1x “Grain Shaker pot” as spawn and 1x 1kg bag of our Coco+Verm+Gypsum bulk Substrate CVG for short.

6: Fruit from the Pot.

Fruiting from the pot is really easy and takes no extra effort. 

6.1 When you have a fully colonized pot of clean grain spawn. All you need to do is bring the pot into the light and maintain the 26-27c incubation temps.

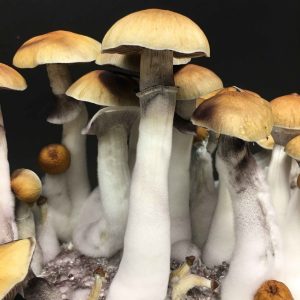
6.2 After placing the pot into a light warm place. Fruits will form in the pot with in 10-20 days. No fanning and misting needed for fruit from the pot.

6.3 Open the pot for the first time to harvest a hand full of perfectly clean Mushroom fruits.

6.4 A larger fruiting bag IS INCLUDED WITH THE FRUITING KIT. This bag can be misted and placed over the top of the open pot for slightly larger fruit to form. This method will allow the mushroom heads to form fully and is best used for taking sterile mushroom prints. The bag acts like a humidity tent so leave the filter clear and free so the mycelium can breathe.

6.5 Secure the bag around the base of the pot with dark tape and incubate at 26-27c and in 10-20 days mushroom will form.

6.6 After harvesting the fruit from the pot. Please weigh the fruit. 80% of the wet fruit weight is the amount of water you need to add back to the pot. Use clean run tap water to rehydrate the cake. So, 50 grams of mushrooms harvested. 80% of 50grams is 40grams water to add back to the pot for example. (40g water = 40ml water).

6.7 After adding the water, put the bag back over the pot and place back into the warm light spot. The water will be absorbed into the cake and the cake will fruit again in 10 or so days.

A wonderful multi use Grain Shaker Pot from Sporebuddies.com

Many thanks

Mark and the Team.

Description

May I present for your Grain Shaking Pleasure. 

“Grain shaker pots” in a re-usable 1000ml pp5 pot with filter lid and dual injection ports.

Fully sterilized and ready to use.

Uses:

1: Directly injectable. Spores to Grain or Agar to Grain.

2: Air space to allow for shaking up the pot for fast colonization.

3: Strain testing for possible contamination.

4: Grain to Grain transfer.

5: Spawn running for Mono Tubs.

6: Fruit from the Pot.


What do you get?

1: 1000ml PP5 pot. (PP5 means Pressure cooker safe).

2: Snap on PP5 Filter lid and two injection ports.

3: 500ml of perfectly hydrated Rye Grain.

4: Double layered tinfoil cover. This keeps the injection ports clean and ready to use. No need to wipe them.

5: MycoMedi glove pack. Contains gloves and a sterile surface to work on.

6: Fruiting bag (10B).

What don’t you get?

1: Spore Syringe and needle. Use minimum of 1ml. Max is 20ml without seeing moisture issues. 

2: Heat source. Please incubate the pots at 26-27c for the fastest germination and colonization times.

3: Alcohol swab. The included foil cover keeps the injection ports 100% sterile and ready to use by removing the foil cover.

4: Fruiting bag for “Fruiting from the pot option”

What do you need to use the pots and how do you do that?

Please see the news section for the instructions HERE

1: Directly injectable. Spores to Grain.

Injecting the spores into the pot. 

1.1 Remove the colored cap from the syringe and after opening the needle packet. Please screw the needle into where the colored cap came out of.

Leave the needle protector in place until ready to use.

Do not heat or wipe the included needle. It has been gamma irradiated and is sterile.

1.2 Remove the protective foil cover from the pots lid. This has kept the injection ports sterile so there is no need to wipe the injection ports. Do not remove the lid or any parts from the lid.

After shaking the syringe very well. Please inject a minimum of 1ml and up to a maximum of 20ml spore solution into the pot. 

Agar pieces can be placed into the pot by removing one injection port. Please add a 1cm square piece of agar to each pot. 

Shake the Grain shaker pot to speed up colonization.
Colonize the pot in darkness.

I like to leave my pots alone after injection and only shake them when I see life appear. Choosing just to place the pots in a GrowBuddie or on a heat pad. Set to 26-27c.

Germination of spores will vary dependent on strain but expect to see life between 3-10 days. 4-5 days being most common.

2: Air space to allow for shaking up the pot for fast colonization.
Shaking the jar to spread the mycelium and speed up colonization. 

2.1 As mycelium tends to grow at the rate of about 1cm a week. It is best to give the mycelium a helping hand. By shaking the pot some 3 days after you first notice life, you will be able to break up and re-distribute the mycelium all through the grain.

2.2 When the mycelium recovers and starts to colonize again. You will see that your shaker efforts have not been in vain. After that first shake and re-incubation at 26-27c. The mycelium will show in multiple places.

Colonize the pot in darkness.

2.3 Shake the pot one more time when the mycelium spots have grown to about 1cm on average.

2.4 The pot is fully colonized when all the grains are white with mycelium. When the pot is fully colonised, it is ready to use.

3: Strain testing for possible contamination.

Use the “Bake and Shake” method to check for any possible contamination. 

3.1 BAKE. You have already followed these steps in part 1 and 2. When you incubated the pots at 26-27c. You would have noticed other colors forming in the pot if contaminations were present. White mycelium is great, but any other contamination will show as a color or smell. The clear pot and the high air flow filter in the lid will allow you to inspect the mycelium. A quick sniff of the filter lid will allow you to recognize any off smells like sweetness or alcohol.

Colonize the pot in darkness.

3.2 SHAKE. Every time you shook the pots to break up the grains and speed up colonization. You also allowed any hidden contamination to show itself. Mycelium has an ability just like the human body does, to hide foreign objects or contaminates and encapsulate them. These contaminates always escape when mixing spawn to bulk. Shaking the pots mimics the process of spawning to bulk. So, if you have clean mycelium after shaking the pot… You know you have clean Mycelium full stop.

4: Grain to Grain transfer.

Grain to Grain transfer or G2G is a method to expand your existing Grain spawn. Allowing one Shaker pots to transfer mycelium to 10 Shaker pots for example.

O4.1 Each Grain shaker Pot comes with 2 injection ports. One of these injection ports will be removed to allow the master pot to transfer colonized grains to the slave pot with uncolonized grains.

4.2 Before removing the injection ports for transfer. You can Shake the Master pot to help break up the grains, so you have some loose to transfer.

4.3 Place both the Master colonized grain pot and the slave un-colonized pots in the sterile environment.

4.4 Remove one of the injection ports on the Master pot. Remove one of the ports on the slave pot.

4.5 Tip the pot to transfer some 5-20 grains from the Master Pot to the Slave pot and when finished please replace the port to the pots to keep the contents sterile.

4.6 Incubate the pots at 26-27c for 3 days before shaking the Slave Pots for the first time.

4.7 If contamination shows at any point. Please discard and start again from a new master pot.

4.8 When a slave pot has passed the Bake and Shake test and is fully colonized. The Slave pot has qualified and can now be labelled as a super clean Master pot. Only qualified Master pots should be used for Grain-to-Grain transfer or Mono Tubs.

5: Spawn running for Monotubs. 

The pot is said to be fully colonized when all grains are white with mycelium.

5.1: With the ability to shake the pots and spread the mycelium. The pots produce Grain Spawn in record times.

Colonize the pot in darkness.

5.2 Follow step 1+2 above to achieve fully colonized spawn pots in just 2 weeks.

5.3 Use a heat source such as a growbuddie60 incubator box or heat pad. All Sporebuddies own brand heating systems come pre set and are plug and play friendly.

5.4 A 45l Mono Tub or GrowBuddie60 will need 3 “Grain Shaker pots” as spawn and 2x 1kg bags of our Coir+Verm+Gypsum bulk substrate. CVG for short.

5.4.1 A 25l Mono Tub or GrowBuddies40 only needs 1x “Grain Shaker pot” as spawn and 1x 1kg bag of our Coco+Verm+Gypsum bulk Substrate CVG for short.

6: Fruit from the Pot.

Fruiting from the pot is really easy and takes no extra effort. 

6.1 When you have a fully colonized pot of clean grain spawn. All you need to do is bring the pot into the light and maintain the 26-27c incubation temps.

6.2 After placing the pot into a light warm place. Fruits will form in the pot with in 10-20 days. No fanning and misting needed for fruit from the pot.

6.3 Open the pot for the first time to harvest a hand full of perfectly clean Mushroom fruits.

6.4 A larger fruiting bag IS INCLUDED WITH THE FRUITING KIT. This bag can be misted and placed over the top of the open pot for slightly larger fruit to form. This method will allow the mushroom heads to form fully and is best used for taking sterile mushroom prints. The bag acts like a humidity tent so leave the filter clear and free so the mycelium can breathe.

6.5 Secure the bag around the base of the pot with dark tape and incubate at 26-27c and in 10-20 days mushroom will form.

6.6 After harvesting the fruit from the pot. Please weigh the fruit. 80% of the wet fruit weight is the amount of water you need to add back to the pot. Use clean run tap water to rehydrate the cake. So, 50 grams of mushrooms harvested. 80% of 50grams is 40grams water to add back to the pot for example. (40g water = 40ml water).

6.7 After adding the water, put the bag back over the pot and place back into the warm light spot. The water will be absorbed into the cake and the cake will fruit again in 10 or so days.

A wonderful multi use Grain Shaker Pot from Sporebuddies.com

Many thanks

Mark and the Team.
Additional information

What kit would you like?

1 pot fruiting kit with fruiting bag., 4 pots for G2G transfer kit ***without fruiting bags***., 25l Mono tub kit with Grain and CVG Mix, 45L Mono tub kit with Grain and CVG Mix, 16xpot and 16x1kg bags of CVG Mix

Reviews

There are no reviews yet.

Be the first to review “Grain shaker pots. For strain testing and grain to grain transfer.”

Your email address will not be published. Required fields are marked *